Showing posts with label crafty.goodness. Show all posts

December 18, 2013

Salt Dough Ornaments

In an effort to do more things with the kiddo in the coming weeks, I snagged an idea from another friend & decided to make some salt dough ornaments for Lucas to paint. And, because one batch of dough makes more ornaments than he would have needed, we decided to invite some friends over!

Because nothing is more fun than watching toddlers try to paint, amiright? (Insert sarcasm here!)

The recipe was pretty simple:
  • 1 cup of salt
  • 1 cup of flour
  • 1/2 (ish -- give or take) cup of water 
Combine the salt and the flour together, and add water little by little until the dough is well mixed but not sticky. If you feel like it's too sticky, or you added too much water, add a little more flour. The consistency doesn't have to be equally half & half but don't go crazy!

Then, roll it out, bust out your favorite holiday cookie cutters, and go to town! Because we are making ornaments, I used a straw to make a hole for ribbon when all was said and done. You want to bake these on a LOW temperature for a long amount of time; I cooked mine on 200 degrees for 3 1/2 hours. At three hours I pulled them out to check, and the back sides were just a tad soft in the middle so I flipped & cooked for another 30 minutes. When they were done, I put them on some cooling racks & they were perfect!


My girlfriends came over & we busted out the paints for the three little ones to have some fun with. I have to say, it was a blast. The kids enjoyed themselves & played well together after they were finished. For me, it was one of the best mornings I've had in a long time. With so many of our friends having moved away this past year, my inner circle has shrunk significantly, and with not working my adult interaction is typically limited to my husband and my husband alone. I love the guy, but sometimes you just need some time with the girls. It was nice to chat with some other moms about absolutely nothing and just enjoy the company.

And the kids truly did have a great time, which was the whole purpose of the morning! Lucas loves to finger paint, but had never used paint brushes before. As a wannabe artist, I have to say I was proud at how quick he took to it. Like a fish in water! We painted quite a few, and  may have to send one or two off to grandparents for their trees next year. But it was truly a great morning. A super easy craft that took no time at all to prepare for paired with great company -- what more can you ask for?!


March 26, 2013

Mustache Bash!

Little man turned ONE last week, and this past Saturday we had all of our closest friends over to help us celebrate! My sister, Aimie, flew in from Seattle and spent the weekend with us, which was GREAT! I adore her and it's always nice to spend time with her. Plus, she was a GEM helping me get ready for the party on Saturday!

We went a little overboard, but we sort of looked at it this way -- with our impending PCS, this may be the last time we have all of our closest friends in one place with us. So many of us are going in different directions in the coming months, so it was nice to have those that matter the most to us in one place. 

We went with a MUSTACHE BASH theme! It seemed appropriately silly & it really was a hit. Guests were provided with some fake mustaches to wear, and I'm pretty sure seeing all the little babies with these on their faces was the highlight for many!


Most of these decorations came from Three Little Monkey's Studio on Etsy. There were SO MANY other things in the package I received that we didn't even print off. Photo props. Thank you cards. Name tags for the food. All so adorable.

The little popcorn bags, the mustache straws and the stick on mustache's themselves all came from our local Party City. We kept the food pretty simple -- popcorn & hot dogs for the kiddos, hamburgers, turkey burgers, pasta salad, a green salad and lots of chips. Cupcakes were ordered from our local grocery store & we bought an over-sized cupcake for Lucas's cake smash. All in all, I think the party was a SUCCESS! We had so much fun & the kids were all so well behaved (trust me -- there were a ton of them!)

It does make me think I'll have to step it up for next year! Guess I should start working on theme ideas now :)

February 12, 2013

First Birthday Prep*

It's hard to believe that in just a few short weeks, my little guy will be celebrating his first birthday.

I mean, really hard to believe.

So hard, in fact, that I get choked up from time to time thinking about the fact that we are getting ready to embark on this celebrating. I won't talk too much about it, because I want to save all of it for his one year post, but in the mean time, it's safe to say that we have started planning for the festivities!

I have been to some pretty extravagant first birthday parties before, but I promise we are not going that route. For starters, we don't have a ton of room in our tiny home! But also, we want to keep it as simple as possible with close friends. A small, quaint gathering for some yummy food, beverages & celebrating the awesome kid that we have had the joy of getting to know this past year!

When we originally started talking about his first birthday, we wanted to do a Star Wars theme. Because, well, his name is Lucas. And it would have been cool. But I'm picky & I couldn't find the type of decorations I wanted, so we scrapped that. And instead, we are going with a Mustache Bash! I thought it would be fun and of course, Pinterest had a ton of great ideas. Most of the actual links were broken (so if you know where any of these came from, let me know so I can give proper credit) except for this one, but we are definitely getting on the ball with making this as adorable as possible. I can't wait for the big day!


June 17, 2012

Home Improvement: New Patio!

About a year ago, M and I decided to take out the existing deck that we had attached to our house, and eventually replace it with some new steps and a patio.

The deck that we had was high, resulting in ZERO privacy because you could see us over the fence. Our dogs would actually get up on the railing and sit there, so that they could see out into the neighborhood, that's how high it was. The deck was small in size, and wasn't very functional. There was barely room for a grill, let alone anything other then one camping chair. Not really ideal for entertaining of any sort. Plus, with the deck where it was, it left little room between the deck and the fence [our back door is actually on the side of the house], making it nearly impossible to get anything bigger than the lawn mower in the back.

So, we ripped out the deck with grand plans in mind to open up the space. When we ripped out the deck, we found a ton of water damage to the house. We would have had to put new siding on that side of the house, so we ended up just spending the money and residing out entire house with new, better, prettier and longer lasting siding. The patio sort of got put to the way-side.

BUT, this year we are finally getting things done. And by we, I mean my darling husband who is out there shoveling dirt and dumping rocks while I stay in the nice, air conditioned home. Hey. Somebody has to watch the baby!

He has been working his butt of to dig out a 12x40 foot area that will eventually be our new cement patio. And I cannot tell you how friggin' excited I am for this!! We have been in this house for five years, and I always dread having a lot of guests over, due to the simple fact that I have nowhere outside to entertain people. But the dirt has been dug, and we got $400 worth of gravel delivered last Friday, which is slowly but surely making it's way to it's new home where it will be the foundation for the cement, which will come at a later date.

Growing up, we spent a lot of time in our backyard. A LOT. And one of my favorite memories is eating summer dinners out on the patio furniture with the family, enjoying the summer weather. I want to do that here, and I want to be comfortable having people over when we want to. So while M is working on getting the area prepped for the cement people, I'm having fun looking at all the sweet patio furniture that I am sure I can't afford.

And maybe a fire pit. :)

And a place to grow some herbs!

Oh the possibilities are endless. I already have some excellent ideas stashed away on Pinterest for when the time comes, and I am totally looking forward to creating a great little oasis for us to hang out in!

February 20, 2012

Make Your Own Crib Mobile


A while back, when we were deciding what to do with the nursery and how to decorate it, I decided that the mobile was one of the things that I wanted to be slightly different than the normal things you can buy at Babies R Us. Not to mention the fact I really wasn't liking anything that was available. So, I searched and searched and found a mobile on Etsy that I loved ... but did NOT want to spend $35 on when it looked incredibly easy to recreate on my own.

So, I set out for recreating it. This project was so easy and looks so good in our nursery! Not to mention the fact that it is totally customizable to your theme & colors. All in all, this project cost about $6.00. SIX DOLLARS! You really can't beat that. Just to let you know, I completely fumbled my way through it with nothing but looking at a photo to guide me. So if you know of a better way to do this, please feel free to do so! However, I promise you ... this is extremely easy!

First things first. Because of the theme of our nursery, I used six different colors for the six different felt balls. You'll be making three small ones and three large ones. I have seen mobiles like this with only two colors, such as white and teal, or black and pink. Whatever your fancy is and whatever you are going with. (Excuse my picture quality in the photos below. It was rainy and dark when I was working on these over the weekend, which means I had zero natural light to shoot with!! They aren't the greatest.]


You are first going to want to cut out even circles for all your felt puff balls. Or whatever you want to call them. Really, I don't have an official name and I feel weird saying "balls" over and over again in this post. Yup. I'm 31 years old. Either way, that's what they are!

But I digress. You are going to want the same number for all your small ones and all your large ones. For this mobile, I used three large felt balls [hee hee! Ok, I'll stop now.] and three small ones. For what is shown, I used eight total felt circles for each ball, both large and small. Use whatever you have around the house to outline your pattern.


See? It doesn't have to be fancy. Technical expertise at work!! I used a pot lid for my large circles [getting two large circles on each felt sheet, four sheets in total for each color] and a random dish that seemed like a good size for the smaller ones [getting four small circles on each felt sheet, two in total for each color].

Please know that I used eight circles for each felt ball. If you want to make them a little more dense, feel free to use more. Just make sure you have an even number [I'll explain why below].


Once you have everything cut out and separated, you will then start putting them together. Take one felt circle and fold it in half. Then fold it in half again, until you get the image below. On the second fold, you'll create a point down at the bottom. At this point I took the hot glue gun and upon the second fold, put a quick dab of hot glue in there to hold it together and to help it keep this shape. Sorry for not taking a photo of that, but it will make sense when you do it. Essentially, where my fingers are holding the felt, I'm holding the glue in place so it can dry.


You're going to want to do this for ALL your felt circles, large and small. I did one felt ball at a time, from start to finish, but do whatever works best for you. Once you have them all glued as shown above, then you are going to start assembling. Because I used eight circles total, I used four felt circles per half [as shown below].

There really is no rhyme or reason to putting these together. Do whatever you think looks best, but essentially, make sure that all glued points come together. This right here is the underside, but the top half looks like half a puffy circle. You'll glue everything together in the middle.

Now, since I used four felt circles for the top half of the ball, I used four felt circles for the bottom half ... eight in total. If you use five felt circles for one half, use five for the bottom half ... ten in total. You get the idea. Make sure you use an even amount otherwise your felt ball will look a little top heavy and won't be uniform in shape or size.

Once you have both halves glued together in the centers, throw some hot glue right smack in the middle and push the two halves together.


Once you are completed, you will have a ball that looks like this:


And when you are done with ALL of them, they will look like this:


Once you have all the felt balls together, it's time to assemble. I used a heavy cotton thread that I bought at the craft store, and the hoop is nothing more than the inside portion of a cross stitch hoop, that you can buy for dirt cheap at any crafting store as well. This particular one is six inches wide.

Make sure you cut plenty of thread before assembling. My mobile hangs about three and a half feet from ceiling to the lowest ball on the mobile, but it's completely up to you how far down you want it to come. So make sure you cut plenty of extra thread to leave room for error, room for adjustment, etc. But essentially, you want two felt balls per strand, one small one and one large one. Play with the way the hang and the distance between the two. I liked mine a little off center and not all even to fill out out a little more, but do what you think looks best.

To attach to the ceiling, I used a simple ceiling hook that screwed into the ceiling in the nursery. I bought it for $.50 at Home Depot.

All in all, this project took me about an hour and a half to complete. The mobile looks gorgeous in our nursery and is definitely unique. Not to mention inexpensive and easy! If you have any questions, let me know in the comments. I'm sure I could have explained a little easier, but since this is my first tutorial, I'm sure I forgot something! ENJOY!


January 25, 2012

Wine & Painting Class*

Hello! If you're here from ICLW, see my lame attempt at this month's ICLW post here. Thanks for stopping by & I hope you stick around!

Recently, a new art studio opened up here in town. As an avid art lover & someone who enjoys painting, drawing, photography & all things creative, I have always been bummed by the lack of art classes this town offers. Growing up in the Northwest, art was something that was engrained in my life from early on and an important part of growing up [for me, at least]. Any chance I had to take an art class of some kind, I did. And while I have all the supplies I need at my home, it's always nice to get out and do a class with other folks to branch out. Unfortunately, that had been somewhat non-existent to this point.

The new studio is literally called "Wine, Paint & Canvas." You bring your own wine [or, sparkling cider in my case right now] and they give you all the supplies you need as well as teach you how to do a painting. You sign up for the specific piece you want to do & everyone does the same thing. At the end you walk way with a beautiful masterpiece done by you! The painting are fairly simple & definitely focuses on beginner techniques, but a couple girlfriends & I thought we would try it out. All in all, we had a blast!


The class lasted a little over two hours and was PACKED. We had a great time just sitting & talking, while also checking each others paintings out. The girls did AWESOME & I was so proud of them! Painting can be difficult for beginners and I thought the other three did such a lovely job!


All in all, I THINK everyone had a really great time! It was nice to get out with the girls for a couple of hours and just relax, while also doing something semi-productive [and working towards that goal of mine to be more artistic this year!] I think we are all definitely planning on going back in the future, and the darling husband has even expressed going on a date night together post-baby. I foresee myself spending a lot of time here in the future for a quick, easy art class.

Check out everyone's finished product: 


January 12, 2012

Pinterest Challenge: Week Two*

Welcome to the Pinterest Challenge: Week Two! If you are new to this challenge [as I'm sure most people are since we're only in week two!] then feel free to go here to check out the rules & all pertinent information.

When we started talking about the nursery plans, I was pretty set with the fact that I didn't want a traditional changing table. The room we are using is a decent size, but there were a few key things that I wanted & didn't want to give up. Space was one of them, which means minimal furniture. In an attempt to not only save space but utilize it as best as we could, we decided to find a used dresser and re-purpose it, using the top as our changing table portion.

We got this baby for $100 from a used furniture store near our house. I fell in love with the detail as well as the size & space. It's a heavy piece & very sturdy, but obviously needed some love:


With this project in mind [even before we found the dresser] I had been keeping my eyes open on Pinterest for ways to re-purpose furniture, as well as ideas in general on what color to paint it. Because we had painted the walls such a dark grey, we wanted to stick with really light & bright colors for the rest of the furniture & I wanted the dresser to really pop. I was willing to do the work necessary for a re-purpose job ... until I got this one. I loved the detail, but sanding this bad boy down was going to be a bitch. What was I thinking??

And then I came across Annie Sloan Chalk Paint on pinterest. A product that claimed to be so simple & fabulous, that no prep work was necessary. A paint that doesn't need any sanding? That fills in gaps & holes, & doesn't leave paint streaks? What?? How is this possible? They also claim that you can use this paint on almost anything: furniture, walls, indoors, outdoors ... anything! After searching many, many blogs to see if the claim was true [do a search ... people swear by this paint product!] & searched for a US retailer that shipped, I ordered the paint & got to painting. Because we wanted something bright, I went with the color Provence:


A nice, bright teal! As soon as I opened the can, I knew I was in love. I should also probably mention that I have no idea why they call it "Chalk Paint." This is not chalkboard paint, so please don't get the wrong idea. I haven't quite figured that out yet. But the paint definitely went on as smooth as people said it would. The paint is a little thicker, so I did have to use two coats. However, if you wanted a more rustic look, one coat would have been fine. A lot of people sand down their projects a little, to give it that little bit of "extra rustic" look but I wanted a good solid color, so I applied two coats and left it as is.

After painting & letting dry, I applied a coat of the clear wax, which keeps the paint from scratching & overall just protects the product. I definitely recommend it. I was hesitant at first, but was glad I spent the extra money. The wax can be reapplied overtime, keeping it in good condition.

All in all, I'm pretty happy with the final product. I think it's the pop of color that we need in the nursery while also being functional. And, I think it looks good :)


Pin It


Alright people! Show me the goods! What did you do this week??

January 3, 2012

Pinterest Challenge 2012*

If you read this blog regularly, you have seen me mention COUNTLESS times about various things I have discovered on Pinterest. More often than not, they are recipes that I try for dinner, because I'm a total foodie and love to cook [I also love to cook really great meals that don't take more than 30 minutes during the week because seriously, who wants to slave away in the kitchen after slaving away at a desk all day? Yeah. Nobody.]

Quick detour, if you are not signed up on Pinterest, follow the link and check it out. It takes a little while to get your account registration approved, but it is totally worth it. And addicting. Don't say you haven't been warned.

My good friend, Cortney, over at A Dog, A Farm, A Canvas, A Quilt wrote a really great post today about how freaking awesome Pinterest is, but how it is also a huge time suck. Like her, I spend most of my time on it [which is a lot] re-pinning things, but rarely ever DOING the things I pin, therefore, making the whole point of the site a big fat waste of time. I will admit that I have found many great recipes through Pinterest that have been solid winners in my kitchen. But aside from the cooking, I haven't done much else.

So here's the plan. folks.

Like Cortney, I am going to attempt to make at least one thing a week that I find on Pinterest. I plan on sharing here, because I want to be accountable for actually being productive. Plus, this will help me out with one of my New Year's Goals. BUT, because I know so many people who frequent Pinterest, and who also happen to blog, I thought I would make this a group effort!

So let's do a link up!

Starting this Thursday, and every week through the rest of the year, do something creative that you find on Pinterest. Whether it's a recipe that you try for the first time, a homemade product, a knitting pattern that you fell in love with & decided to make, a photo that you took that was better than past photos because of tips you found on Pinterest .... you get the idea! Every Thursday I will open up the links and keep them open throughout the weekend. Come here, share your wonderfulness and see what other people are doing. Maybe you'll be inspired to try something else new!

Since it's already Tuesday, and Thursday is right around the corner, let's start the week with anything that you have done from Pinterest in the past. If you have already blogged about it, feel free to link up to that blog post. If you haven't blogged about it, but want to, feel free to do that as well.

I've written a detailed page with instructions, what to post, what to include, etc and you can find that here [or, by clicking "Pinterest Challenge" up in the menu bar!] Eventually, I will also include a button that you can add to your site & include in your posts.

Let's have some fun, people!

October 14, 2011

Fall Decorations*

I've been wanting to spruce up the house for the fall for quite some time now [DESPITE the horribly shitty 80 degree weather that we are still having. Whatthefuck, Summer? I know it's the South and all but it's still Mid-October. Can we move on to cooler temperatures? PLEASE?] but because of, again, recent events, those plans have been derailed.

Which is OK because I have found some more cute ideas that could easily last until after Thanksgiving. When all the Christmas crap that I LOVE putting up [and my husband detests] comes out. Yes. I am that person that decorates for Christmas the day after Thanksgiving. :)

First off, this adorable leaf garland:


I think this is adorable, minus the kid aspect that was thrown in. It's an adorable craft for kids, but I think there is a way to spruce it up and make it more adult appropriate. I also love the idea of this monogrammed pumpkin from The Girl in the Red Shoes:


I love, love, love pumpkins as decorations on my front porch, as well as plenty of mums. But I am not really a fan of carving them because I like having them throughout the fall. Once you carve them, they are only good for a couple of weeks. And a Jack-O-Lantern isn't really appropriate for Thanksgiving, me thinks. But something like this could easily last through the season, and the pumpkin would still be good to gut Thanksgiving weekend for lots of pumpkin goodies. I have also seen a version of this where the entire pumpkin is painted white, making the black lettering stand out. Either way, I love this.

I also think a good fall wreath is in order, such as this one from TwoInspireYou's Etsy shop:


Our front door is actually a bright orange. We got new siding for our house this past summer and wanted a bright color for the door. Since the siding is a dark grey, we went with a bright orange. It looks awesome if I do say so myself, so it's already aiding in my decorations for my most favorite season. Something like this with some more black tones in it [versus the orange] would be perfect.

Any favorite decorations that you love creating every year? Or is this the year you step it up [like me] and start being creative?

October 1, 2011

When Life Throws You A Curve*

The past two weeks in our household have been pretty rough, as my husband and I have been dealing with some personal family issues. I've talked about it on twitter -- because, well, a girl needs an outlet -- but my husband will be flying back to Portland today to spend the next two and a half weeks with his family, until we can get some things figured out.

I realize that kind of sounds misleading, so I will say that we, as a husband & wife, are fine. But some health issues with extended family are causing us a lot of concern. If I need to fly out I will, but because of the pregnancy he doesn't really want me traveling and being under the extra stress. So here is where I stay until absolutely needed.

I will say that the outpouring of support from our friends and family has been amazing. My husband is very much an "I can carry the weight of the world alone on my shoulders" type of guy & I have been trying to tell him that we have an amazing support group both here and afar, & we need to utilize that & let people help us. I am forever grateful to the friends who have listened to me talk about what's going on, what I'm thinking & how I'm feeling, and it just proves to me that there are just some people in our lives that may not be blood, but are not any less family than the real thing. And for that, I will never be able to repay them or thank them properly.

So I will be solo for the next two and a half weeks unless I absolutely need to fly to Portland. I'm hoping that things work out and that it won't be needed anytime soon [*fingers crossed*] but it's nerve wracking to think otherwise. So in the meantime I'm hoping to just keep as busy as I can and get some things in order in the house. I have a SERIOUS pantry reorganization project that needs to happen, and I have some friends coming over next weekend to help move some furniture, so that I can get started on painting the nursery [yay!] & getting the old office/new guestroom in order & livable condition. I'm hoping to bust out some creativeness & if I come up with anything spectacular, I will be sure to share with you all! On top of that, I have some fall decoration plans that I am hoping to get accomplished.

All of this leads up to the well baby ultrasound the day after M returns. I'm excited to see the little guy/gal & no! We are not finding out the sex of the baby! Surprise! There are a lot of reasons for that, and we will get into that in another post! But for now I'm just prepping as much as I can! I'm looking forward to getting the nursery started & have some found some great prints for the walls that I may be ordering soon. I can't wait to document the process.

I hope everyone has a wonderful weekend! It's sunny but low to mid 60's here this weekend, which is a NICE break from the 80 degree weather we are still having. Gotta love the South!

June 7, 2011

Wishful Thinking*

I am a Pinterest addict.

I really can't help myself.

I spend at least an hour each night, if not longer, cruising through the site, looking at all the adorable crafty things i wish i had time to make, home improvements i wish i had time to do, and awesome photographs i wish i had time to take.

If you are not on this site you really should be. I promise you. It's fabulous.

Lately, though, i've been on this baby "stuff" kick. I avoided it for a really long time, because lets face it ... the likelihood of me buying baby stuff anytime soon is kind of a joke. I mean, i'm not even pregnant as of right this very second. And even if i was, i learned my lesson last time from buying baby stuff too early.

But there is just so much cute stuff out there. So many great ideas for nurseries. Adorable onesies [and some just downright hilarious]. Cute photos. All the things that aren't really in my immediate future.

And I can't stop looking at them. I created a whole board called "Maybe Baby" that has basically become my wish list for things I want to do, or buy, or create. Maybe it's my subconscious being optimistic, but the bitter, spiteful all around negative nancy in me says that i'm wasting my time.

Seriously, i wish that person would go away, but that's another blog post for another day.

Either way, if i can't do these things for myself, someday i'll do them for somebody else. Maybe i'm crazy -- who knows. But I like thinking about it!

December 23, 2010

new blog design*

As you may have noticed, I have a pretty new blog design! I want to give a huge, huge shout out to Shay, over at Dumplin Design Studio who whipped this thing up for me. She was so fabulous during the whole process [and hey, I'm easy to please so hopefully I wasn't a difficult customer!] and really listened to what I wanted.

She is super duper affordable, and you must go check her out for all your blogging and business needs. Her style is everything that I love about blog design, & I will definitely be using her in the future.

Thank you, Shay, so much!

December 14, 2010

Themed Birthday Party!

In about three weeks, I turn 30.

Yikes.

I'm not really prepared for that milestone, & I sort of am all at the same time. My 20's were so wonderously fabulous to me, that saying goodbye to them is like saying goodbye to an old friend. [Which, that is another post for another day]. But I feel like so many great things will happen in my 30's, that I am looking forward to the future.

But in the mean time, in order to ring in the new year and celebrate in style, I'm throwing myself a huge birthday bash. We are doing an Alice in Wonderland themed costume party, & to say that it is getting out of control is most definitely underestimating the situation.

My crafty side is taking over. I have found so many great things that I want to do for decoration purposes to really bring out the theme! I'm looking forward to my 10 day vacation from work to really get some of these things banged out.

For instance!


How adorable is that? [via The Long Thread] Since I [naturally] am going as the Queen of Hearts, this is a perfect garnish of sorts for around the house. Ideally, I would like to find some jumbo cards, but I'll take whatever I can find!


This heart garland is also a perfect addition to around the house. Originally meant for a Valentine's Day decoration, I still think it will work wonderfully for a Queen of Hearts garden!


And YUM. Cakes in a jar! I think this would be the perfect giveaway for the party, or at the very least, an easy way to serve dessert.

I have a whole board over on Pinterest [which is the greatest website ever if you are not a member!] dedicated to this party, and am looking for some more great decoration ideas. Alice in Wonderland has always been a favorite of mine, and I am looking forward to bringing some of the vintage style of the story to the party as well.


December 7, 2010

New Design

I have enlisted the help of Shay Bocks, over at Dumplin Design Studio to help me redesign this here blog. I have some experience with HTML, and could more than likely figure out to do everything that I want to do on my own. But the fact of the matter is, is that I don't have the time.

Or the patience.

Plus, her designs are so simple & preeeetttty!

I cannot wait to see what she comes up with, and I am confident that she can help me get my message across the way I want to! I really am trying to take this little blog to the next level, and am hoping that a pretty design will help draw some people in.

Can't wait for it to be finished, and I will let y'all know when it debuts!

August 16, 2010

Tea Cup Cozies

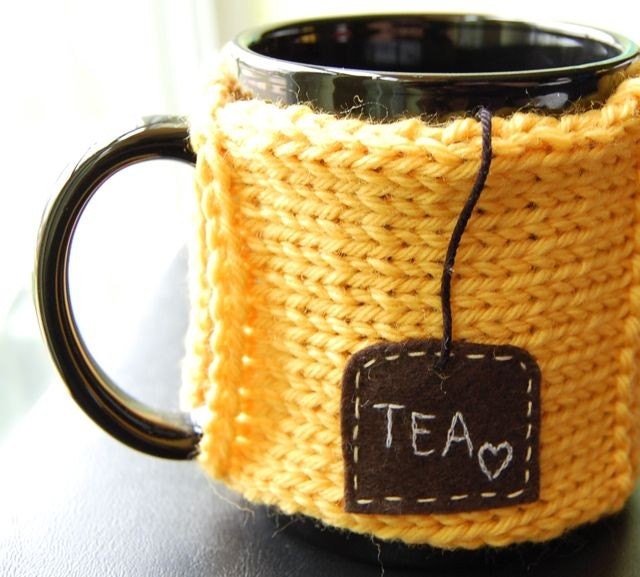
i love coffee. i also love tea. this adorable shop on etsy [my favorite browsing site!] is selling these adorable "tea love mug cozies." i may just have to order a few!


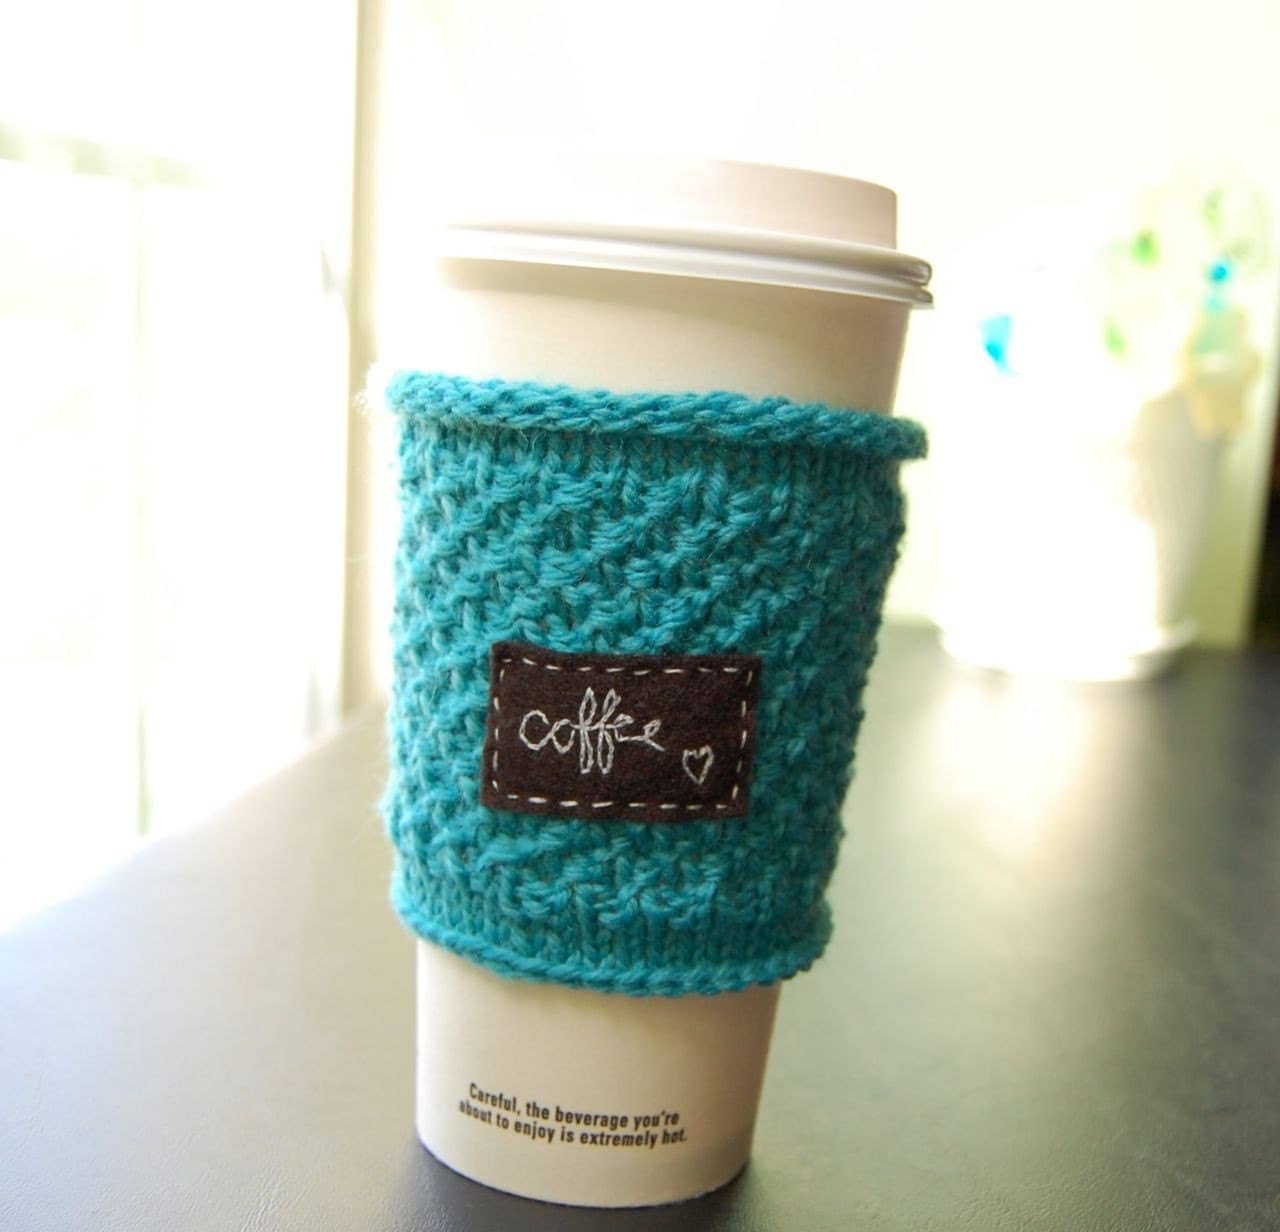
this is the one in particular that i want. i definitely drink more coffee than tea, & it typically comes in one of those starbucks cups ;)